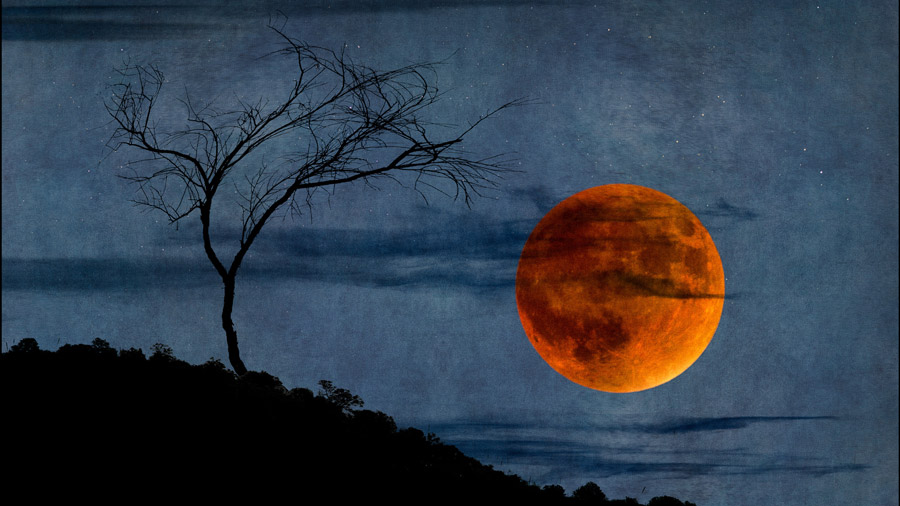
Use Free Transform to Enhance Creative Work
Photoshop's Free Transform can help you bend elements to more compelling compositions
5.22.2020
I use Adobe Photoshop’s Free Transform tool on almost all of my creative photography projects. There is rarely a cloud that doesn’t appear more graceful or delicate after adding a little curvature, or a tree that doesn’t get more interesting with some bending or stretching. Old shacks gain character with more sag in the roof. Foregrounds benefit from being less flat, backgrounds contribute more drama with taller mountains, and dirt roads come alive with an exaggerated S-curve.
In most cases I warp, though sometimes I squeeze or stretch the object—like making a shack proportionally taller or flatter—using Free Transform.
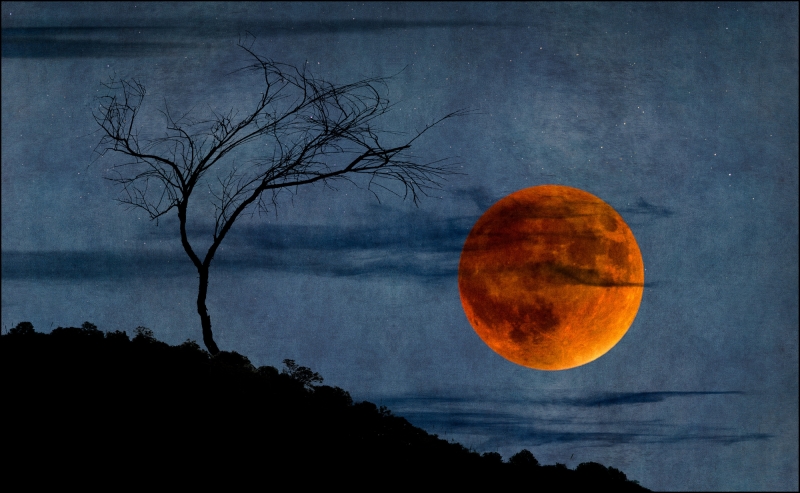
Let’s look at how to apply the tool to a tree. Here is a simple, four-layer composite image featuring the moon during an eclipse and a tree.
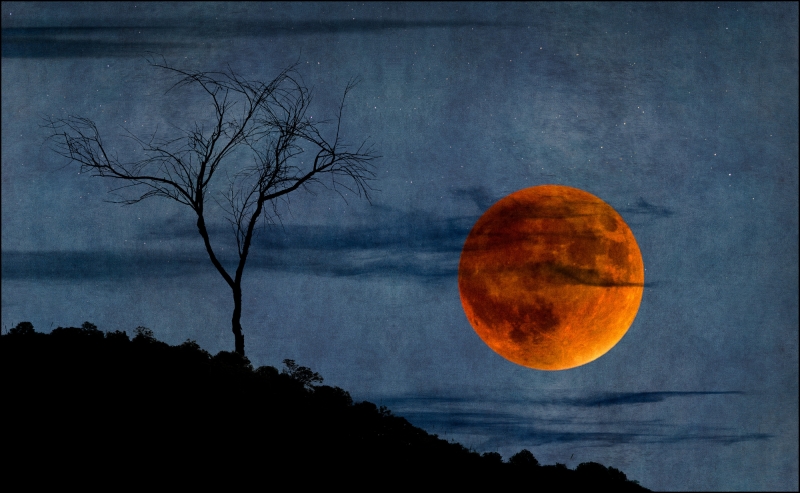
There’s nothing wrong with the tree in this image, but it simply doesn’t speak to me. I’m looking for a relationship between the tree and the moon. I want the tree to bend toward the moon the way a plant grows toward the light. I want the tree to adore the moon. So working on the layer with the tree, which has been isolated from its background, I select cmd/ctrl-T then right-click in the image to access the pop-up menu and select Warp.
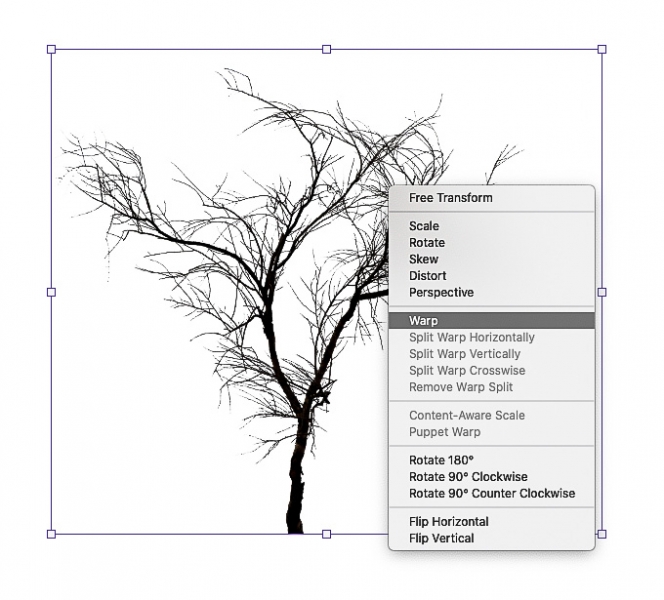
Now I can pull, push, and stretch by clicking and dragging until I arrive at the expressive tree I’m looking for.
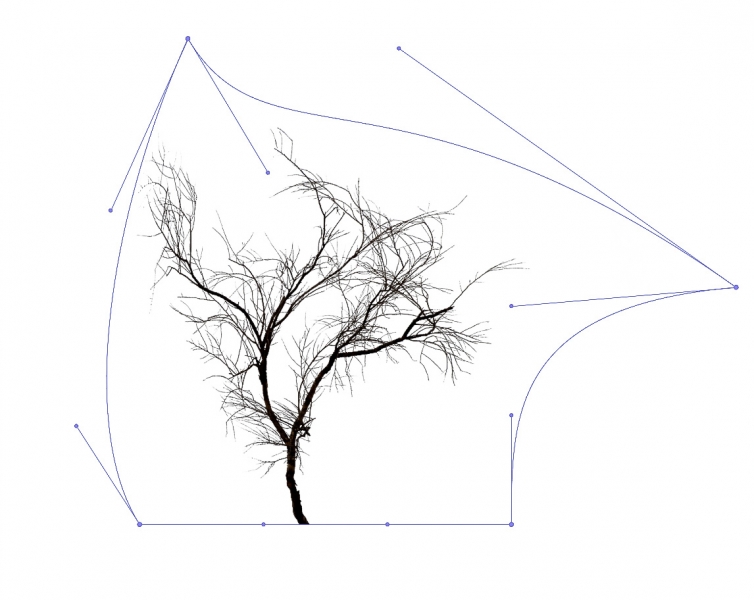
Once I’m satisfied, I hit return/enter. This is the tree I wanted, a tree that has surrendered to passion, longing to embrace the moon.
Let’s see how to add character to an old building or cabin. Here’s a great shack I spotted from a two-lane road in West Texas.
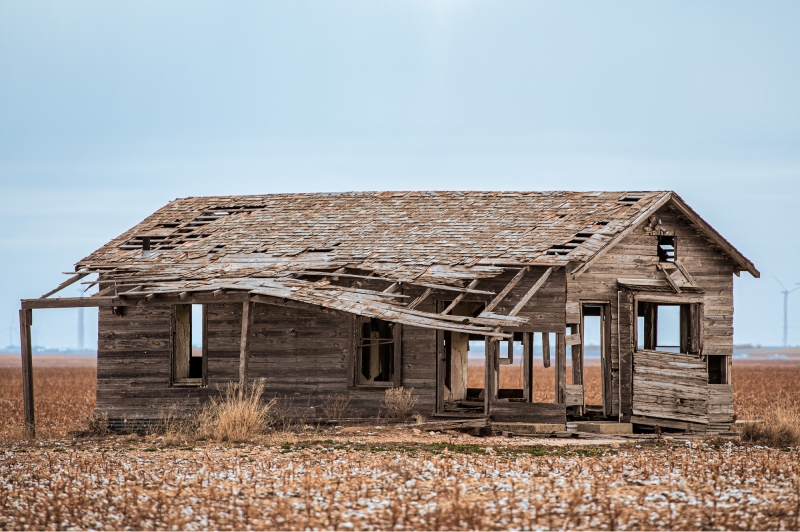
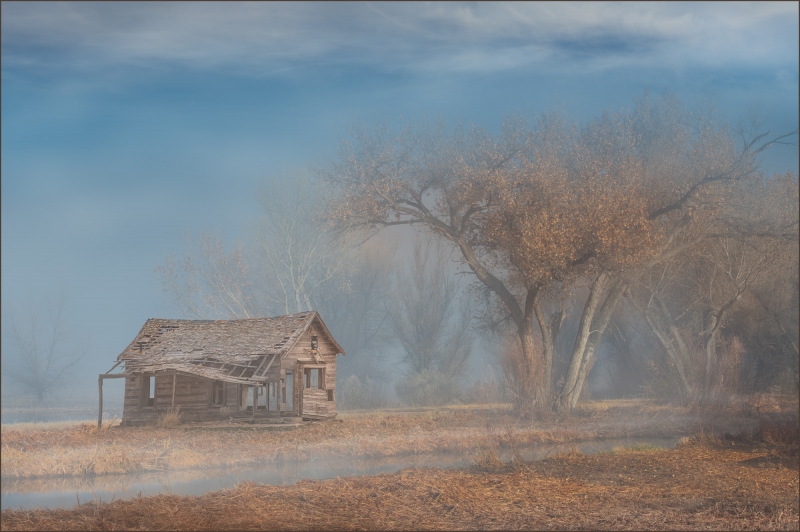
I have a foggy scene that’s been waiting for just the right shack. This one has lots of character, but I’d like to make it just a little bit more feeble and tentative. And it’s too long and flat; I want it to be higher in proportion yet sagging at the same time. Using Free Transform as described above (cmd/ctrl-T, right-click, and select Warp) I’m going to give the roof some sag. I do this by pulling up on the top corners of the handles and pushing down in the middle. I’m also going to pull the front a bit forward and add some sag to the back post. Experiment as much as you like until you get the intended results.
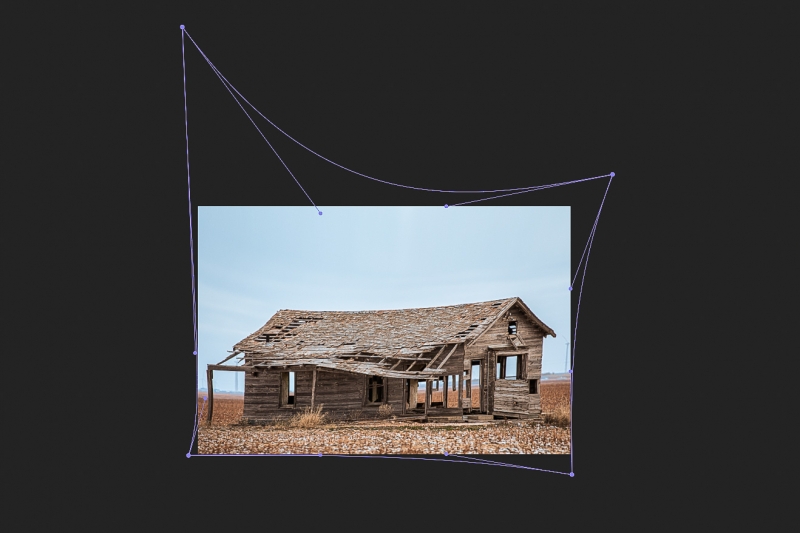
Next, while still in the Free Transform tool, I’m going to right click again, get the pop-up menu, and this time I’ll select the basic Free Transform option from the top. I then shift drag the sides of the image to change the proportion to better fit my vision.
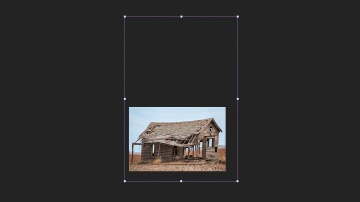
Once satisfied, I hit return/enter. Now I’m ready to eliminate the background and transfer it into my foggy scene. I resize it there, again using Free Transform to fit the scene. The default behavior of Free Transform in Photoshop 2020 maintains the same proportions when you use it, and you have to shift-drag to change the proportions. In this final scene I added some foggy haze with a negative adjustment of the de-haze slider in the camera raw filter, made final color adjustments, and brightened the front of the shack since it’s facing the light source.
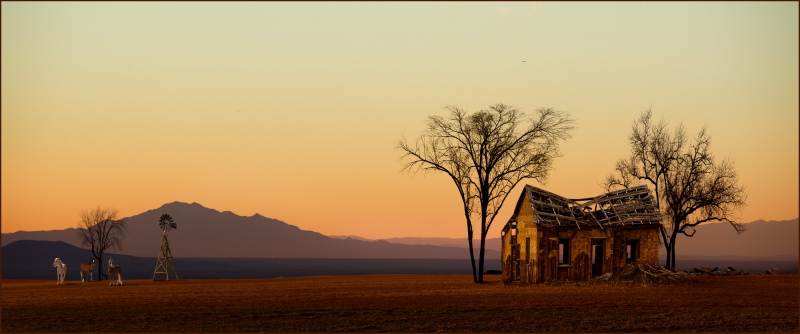
Let’s move on to clouds and skies. I rarely accept clouds at face value. They can almost always be improved to fit the scene better. The Photoshop composite below looks decent with no clouds, but I’m wondering how it might look with a dramatic sky. The scene already has an old house and three trees that I altered using Free Transform.
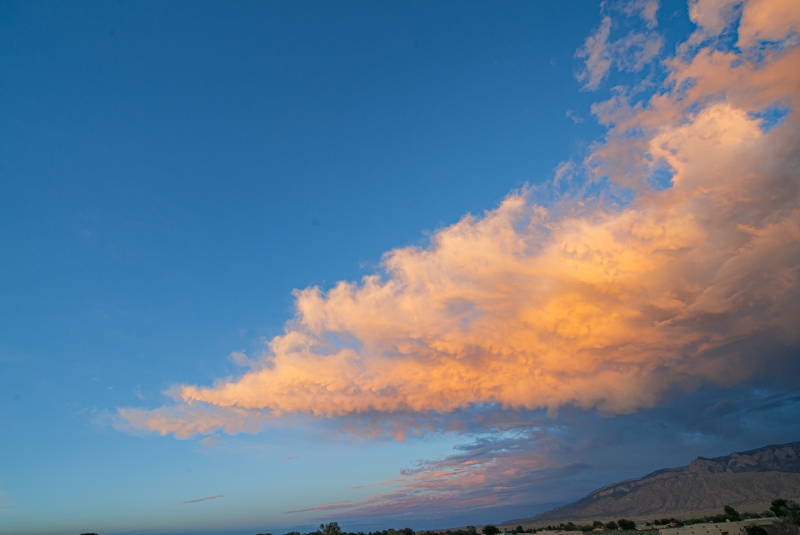
Searching through Lightroom, I found this cloud photo that I thought might add drama to the scene without stealing attention from the subject.
I needed more room to work on the cloud transformation, so I expanded the canvas area by selecting the crop tool and dragging to the left and to the top to add canvas. I roughly matched the shape of the target image, which is about twice as wide as it is high, but accuracy isn’t critical at this point.
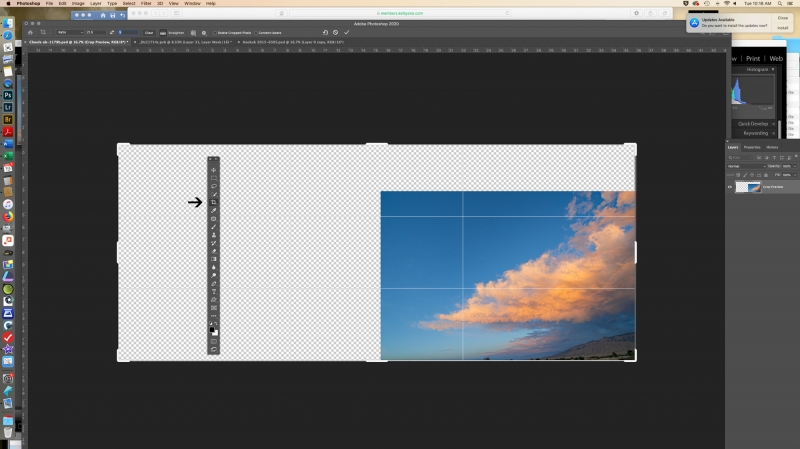
With Free Transform and Warp I stretched the clouds and add some sweep to the formation.
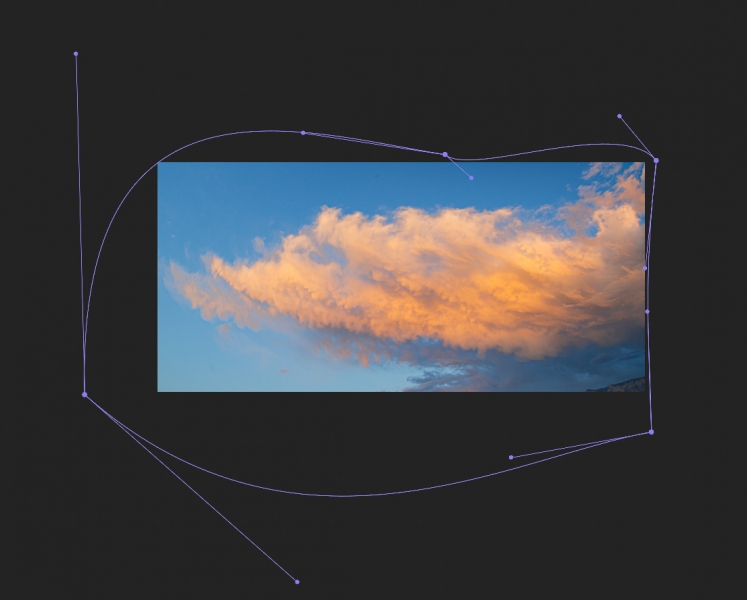
Next, I brought the clouds into the target image, positioning the cloud and sky layer above the foreground layer and below the layers with the shack and trees. I made final adjustments with Free Transform to make the clouds fit the composition I wanted.
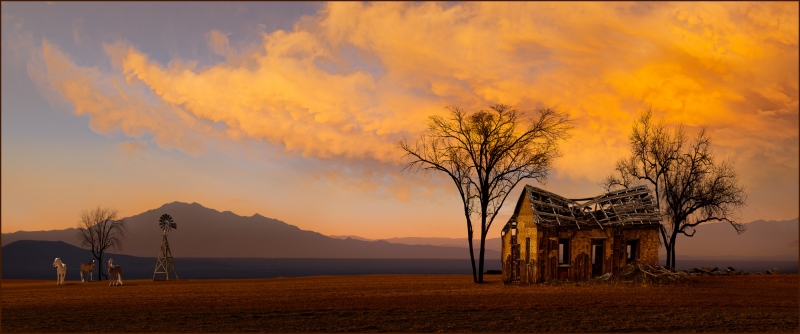
While all these illustrations were done with Free Transform, I sometimes use the Liquify tool for fine tuning the adjustments. The Puppet Warp tool is good for precision work, but it can be time consuming and it’s rarely necessary. Most often I can do everything I want with just the Free Transform tool.
For extreme stretching of clouds as shown above, people often ask me if it causes problems with the pixels. I always take a close look at the finished product, and I’ve never seen any banding or other anomalies. It’s important, though, to work in 16-bit mode.
I hope you enjoy exploring Free Transform and what it can do for your own creative work.
Dennis Chamberlain is a fine art photographer in Albuquerque, New Mexico.
Tags: creative photoshop post capture

