Time-Lapse Made Easier
Though landscape and nature photographers are the typical creators of time-lapse photography, a great time-lapse can benefit nearly any type of business.
• July 2020 issue
Time-lapse photography is not a new concept, but its evolution in recent years makes it increasingly easier to learn the technique and create stunning videos. Though landscape and nature photographers are the typical creators of time-lapse photography, a great time-lapse can benefit nearly any type of business. Setting up a time-lapse capture depends on the tools you use, and I’ve found that the ones I discuss here make the job easier and deliver excellent quality.
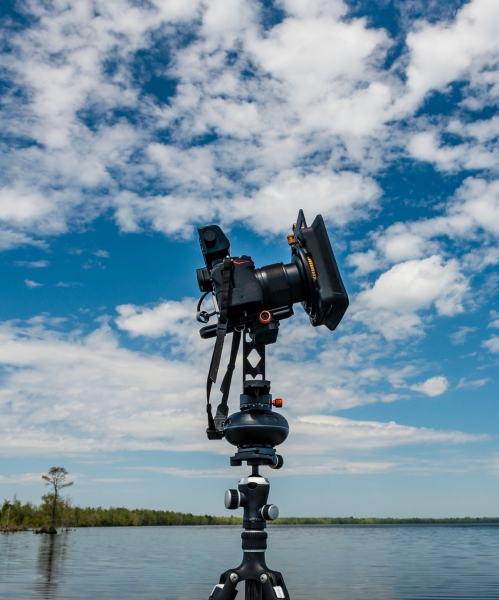
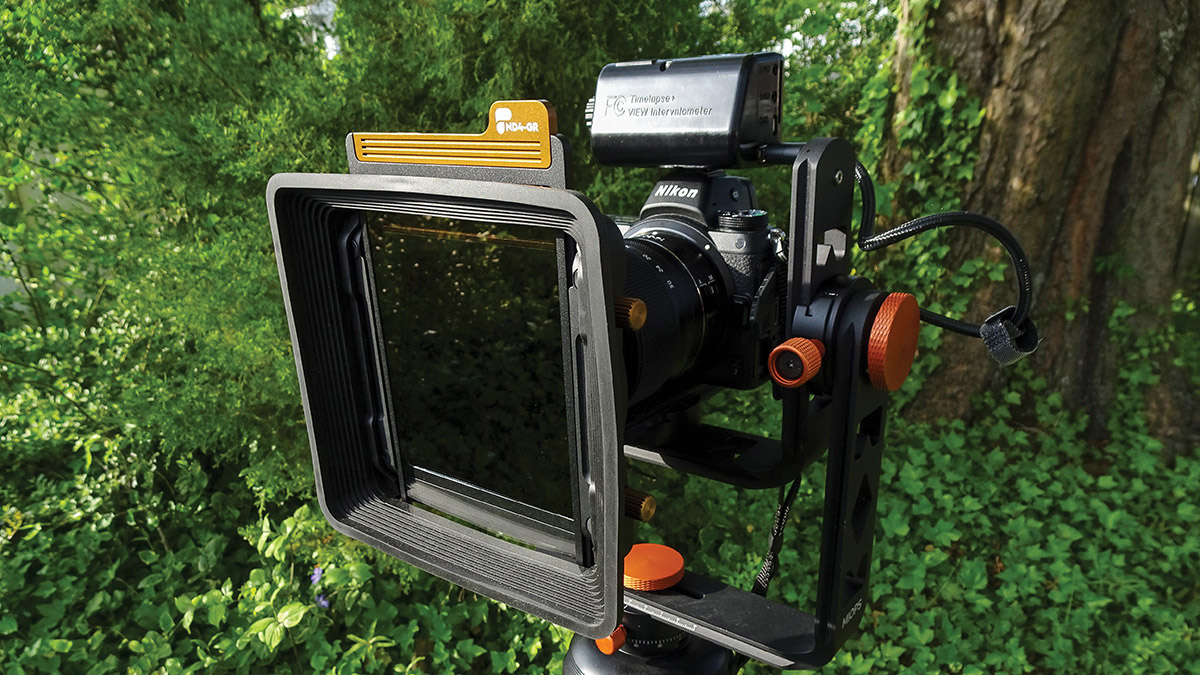
This time-lapse setup uses the Nikon Z 7 with Nikkor 14-30mm f/4 S lens, the Timelapse+ View intervalometer, PolarPro Summit landscape filter system (CPL, ND64, ND4-GR), a Miops Capsule360 motion box and Pan/Tilt kit, and a Gitzo Series 1 Traveler tripod.
It used to be that a camera capturing time-lapse images required constant attention, which meant a labor-intensive process that called for a dedicated assistant. Many camera bodies now allow for more automation but at the sacrifice of quality. My definition of high-quality time-lapse is a camera capturing individual full-resolution raw files frame-by-frame for complete control and resolution in post-production. If you have a reliable and accurate tool to capture a time-lapse, you can set it up and focus on performing your main job.
That is where the Timelapse+ View comes in. The View is a powerful intervalometer and automatic exposure and interval ramping device that allows photographers with little time-lapse experience to create stunning products. What used to be extremely difficult, the holy grail time-lapse of a day-to-night/night-to-day sequence, can be accomplished with ease. It’s not unusual for weddings and other events to involve dramatic light changes, particularly outdoors.
This sunset time-lapse sequence captured at The Point Overlook in Shenandoah National Park (below) incorporates a horizontal pan with extreme changes in light, all rendered smoothly into a professional-level final product.
The View allows for operation and monitoring directly or remotely as well as changes to the parameters during the shooting process. The View can connect to a Wi-Fi network, allowing someone with remote access to monitor and adjust settings once the rig is in place or to access it locally with a mobile app. The unit is compact and lightweight. It attaches to your camera’s hot shoe or mounts with a cable to the camera body.
Many cameras now have a built-in intervalometer, but if you use aperture priority and auto ISO to control exposure, the camera meters for each individual frame. If a significant light shift occurs temporarily, the exposure change can cause unwanted effects. Anything from car headlights to bright lights from a venue’s entertainment system temporarily shining on the camera’s lens can cause this sort of shift. In setup, the View uses the initial exposure’s luminance as the basis for the rest of the frames, preventing massive individual shifts in metering. A change in lighting is seen only when the exposure of multiple frames is affected, ensuring a smooth sequence.
One of my favorite features of the View is that you can preview the time-lapse in real time without touching the device, even as it’s in progress. You can watch the sequence in the mobile app or use the gesture sensor on the device itself. On the back of the View, its settings and status screen doubles as a preview screen. When it detects a single hand gesture it displays the status during the shoot, and after a second gesture it shows the video captured to that point. You can also adjust settings without touching the rig. Inevitably, at some point, a time-lapse will be marred by an unfortunate bump to the tripod or touching the camera. The View removes the need to make contact, reducing that risk significantly.
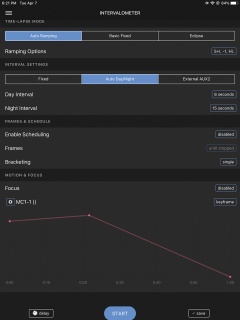
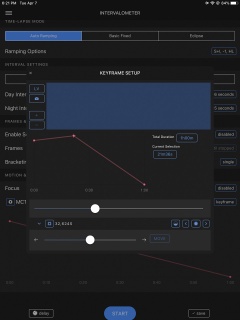
In the View’s app, programming keyframes to allow for directional shifts in motion is simple. For systems without full integration, the View’s auxiliary synchronization connection methods work with just about every other system.
Other elements to consider for capturing time-lapse sequences are neutral density filters and post-production software. Neutral density filters slow the camera’s shutter speed, making the resulting video look smoother and reducing the jerky effects of certain elements in the frame, such as long grass or tree branches. In certain situations, using a graduated neutral density filter is useful. I find that the PolarPro Summit Landscape System is the cream of the crop, producing no noticeable loss of sharpness or color cast. For a more compact setup, my go-to is the PolarPro variable ND filter Peter McKinnon Edition in the 2 to 5 stop variation.
Post-production software to assemble, smooth, de-flicker, export, and render your sequence can make or break a video. The gold standard application is LRTimelapse. The majority of the process takes place within its semi-standalone program, and Adobe Lightroom is required for editing keyframes and exporting the raw files into intermediary files, such as TIFF or JPEG, which the rendering software uses to create the final video. LRTimelapse, unlike other options on the market, can render the video without requiring any additional software. However, after exporting the intermediary frames, any video editing software capable of rendering time-lapses will work. Timelapse+ offers the Lightroom plug-in Studio, but it lacks the rendering functionality.
Time-lapse photography can be as simple or as hard as you make it. Timelapse+ View makes capture extremely easy and requires minimal learning before startup. Reliable automation allows event photographers to offer an original product to clients that requires minimal attention in the field once started. Even adding motion is nearly seamless. The post-production can be complicated at first, but it gets easier as you develop a workflow. While the View’s price tag is above that of the average intervalometer, its unmatched features make it worth the cost.
Pros
- Reliable and accurate
- Preview of time-lapse while shooting
- Touchless operation
- Integration with third-party motion control devices
- Expandability and constant updates for new products
- Compact and Light
Cons
- Price
- Some Sony users report compatibility problems
For a limited time, when you purchase a Timelapse+ View and enter the code PPMagazine at checkout, a portion of the proceeds will be donated to COVID-19 Freelance Artist Resource.
Brian Akerson is a landscape and nature photographer based in Great Bridge, Virginia.
Tags: video