Product review: Alien Skin Exposure X3 software
A review of Alien Skin Exposure X3 software for photographers
• March 2018 issue
Alien Skin Exposure software has grown from its start as a plug-in with great analog presets into a raw processor with an ever-expanding feature set. While version 2.5 took a big step with the addition of layers, the current Exposure X3 adds new features that increase the software’s capabilities and appeal.
The majority of Exposure X3’s updates help you better manage photos. Keywords are a critical component of organizing a searchable image library, and Exposure X3 offers several options to ensure that all images are properly identified.
There are a couple of ways to build a keyword library. One is to create lists and sets of descriptions in the new Keyword Library panel; these can be applied to images already on your hard drive or during import when copying files from a media card. When the card is plugged into a card reader, the software automatically opens a dialogue box. The metadata in the dialogue box now includes options to apply keywords from the library and directly in the panel. It’s a quick and easy way to get a headstart on keywording new images.
When you apply new keywords to photos on import, they’re also automatically added to the main keyword library. Since the keywords live in a sidecar file—along with other metadata—the information travels with the files. There’s an option to exclude keywords when exporting files if you don’t want clients to see them.
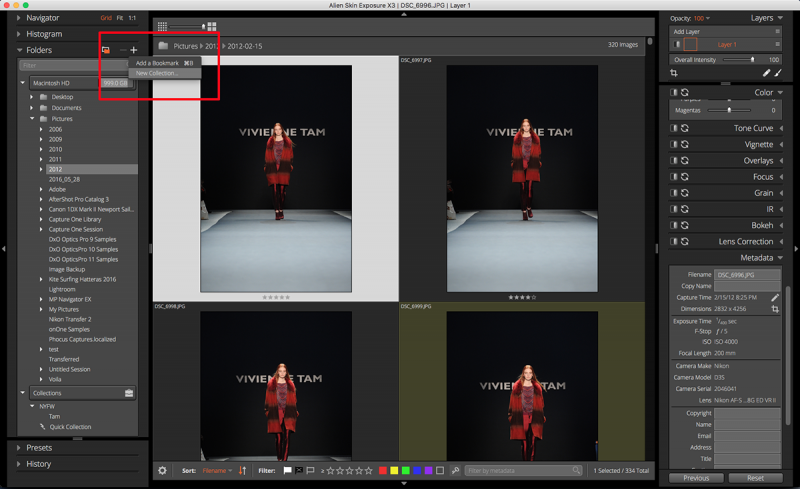
Creating Collections and Quick Collections is drag-and-drop simple.
Collections and Quick Collections have also been added to Exposure X3. (There’s no Smart Collection in this version, but I wouldn’t be surprised if it was added later.) Creating Collections and Quick Collections is drag-and-drop simple. Just specify and name a collection, add a sub-collection if you’d like, and drag and drop images. A Quick Collection is created with nothing more than a single click of the L key (click again to delete the selected image). Thanks to virtual copies (more on that in a moment), the same image can be added to multiple collections without gobbling up additional hard drive space.
Another useful feature is the side-by-side view, which is ideal when comparing similar images. It’s limited to four images (I’d love to have the option to add more), but they can be displayed in several different configurations: vertical, horizontal, columns, rows, and quad. I find quad the most efficient, especially for vertical shots. The four images can be synced to move in tandem when panning and zooming, which is key when selecting from among several shots.
One or more images can be pinned to their location in the comparison window, which is fantastic when you’re culling photos. Just look for the little pin icon in the upper right corner of each image.
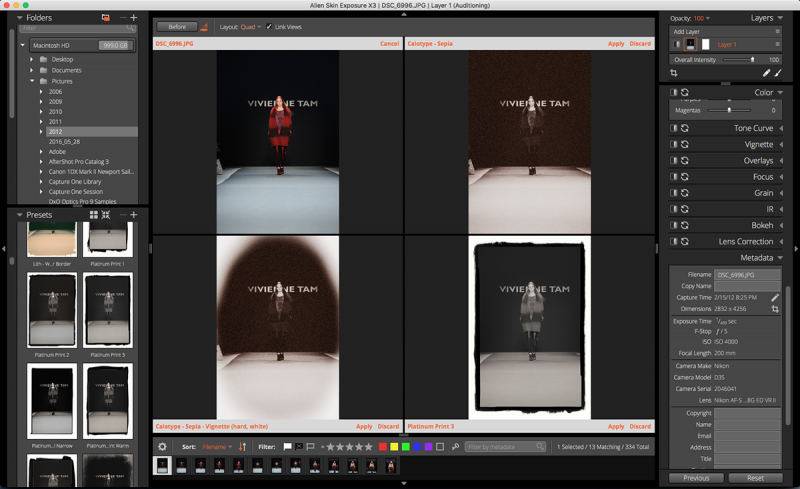
In the Audition Presets mode, you can compare, apply, or discard any of Exposure X3's many effects.
To the left of the pin, the Audition Presets icon allows you to choose a single image and view it with different presets with the same layout options used in the comparison mode. Just drag and drop a preset into the other three spaces in the display. You can change presets (click Discard in the lower right corner) and drag and drop another. To apply the preset you like best, click Apply in the lower right corner and the other presets will be discarded. In this version, Alien Skin has added linear and radial presets to its collection of more than 500 film emulations.
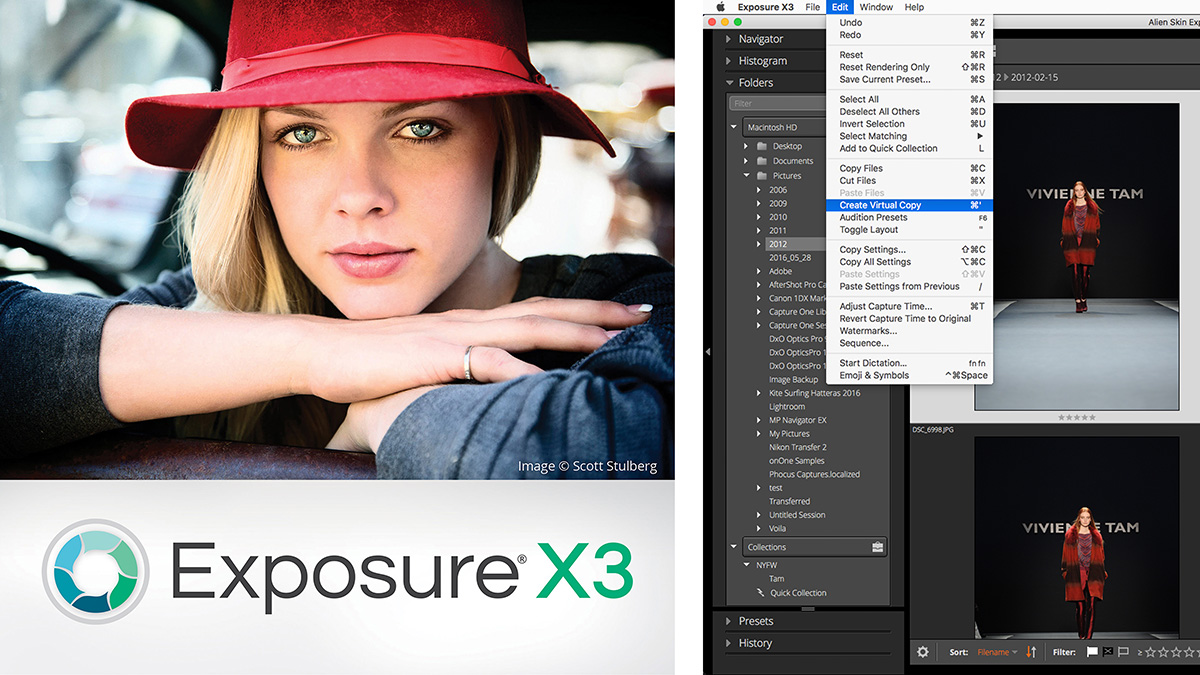
Which leads us to virtual copies—another new and welcome feature in Exposure X3. You can create as many virtual copies as you like and even make virtual copies of virtual copies, edit each one differently, and save or discard any or all of them. Exposure X3 identifies virtual copies by a small turned up corner on the lower left of the thumbnail. Head to the Metadata panel to name the virtual copy for easy identification later.
Alien Skin has added other features to X3, including linear and radial gradient tools, new overlays (and a batch overlay import option), along with new sliders for Blacks and Whites, Orange and Purple color saturation sliders, and a few others. You can find the full list of features, with the new additions highlighted, at alienskin.com/features.
Although all the updates in this version are welcome additions, the new keywording and collections features alone are worth the upgrade for current users. Beyond the new features, there is a lot to like about Exposure X3: the single-window user interface, the collection of analogue presets, and the ability to work directly from folders rather than having to import images into a catalogue, as you do with Adobe Lightroom (which is a personal pet peeve). As someone who works with multiple external hard drives, especially when traveling, I find it’s a much easier workflow.
Exposure X3 may not be the only software in your image-editing kit, but if you’re looking for a non-destructive editor with solid raw processing capabilities and a quick, easy workflow, take Exposure X3 for a spin by downloading a free trial. Alien Skin provides excellent video tutorials on its site, and over the years I’ve seen how dedicated the team is to making this software better and better with each update.
Available for Mac (OS X 10.10 or higher) and Windows (Win 7 64-bit or newer), Alien Skin Exposure X3 operates as a standalone application or a plug-in for Adobe Photoshop (CS6 or CC 2015 or newer) and Lightroom (Lightroom 6 or Lightroom CC 2015 or newer).
Alien Skin Exposure X3 costs $149 ($99 upgrade) and can be purchased in a bundle with Snap Art and Blow Up for $199 ($119 upgrade).
Theano Nikitas has been writing about photography for more than 20 years.
 View Gallery