
Luminar challenges the big dog
Luminar burst onto the image editing scene from what was then Macphun Software to challenge the Adobe juggernaut, offering a low-cost alternative and promises
5.22.2018
Luminar burst onto the image editing scene from what was then Macphun Software to challenge the Adobe juggernaut, offering a low-cost alternative and promises of constant upgrades to make that happen. The cost has remained low at $69 and the updates have placed Luminar in strong competitive position. Macphun has changed its name to Skylum Software, partly to acknowledge the release of Luminar for Windows as well as Mac computers. With the release of Luminar 2018 1.2.0 (Jupiter), the program on both platforms includes nearly identical feature sets and strong competition for Adobe Photoshop CC, Adobe Photoshop Lightroom Classic CC, and their competitors.
With the release of the original Luminar 1.0 for Mac computers, the software showed potential as a powerful image editor for all levels of photographers. That release was followed shortly by a Windows version with a reduced feature set. The release of Luminar 2018 1.0.2 brought the two versions closer, and now version 1.2.0 puts them very nearly on parity, with new features for both.
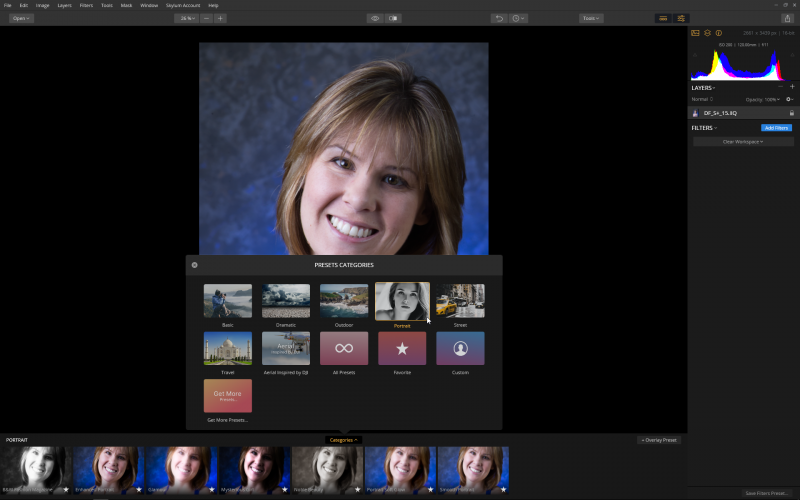
Seven presets, including Portrait, are built into Luminar to get you started.
The new features in both versions include the ability to make automatic lens corrections and improved raw file conversion. For the Mac there’s also greatly improved speed in opening raw files and applying adjustments. These add to the Accent-AI artificial intelligence filter, creative workspaces, masking tools, and vignette tools introduced in the previous version for both platforms.
The Windows update includes the ability to sharpen and resize on export, a free transform tool, the ability to flip and rotate images, batch processing, and a full-screen preview function. These were all previously available in the Mac version.
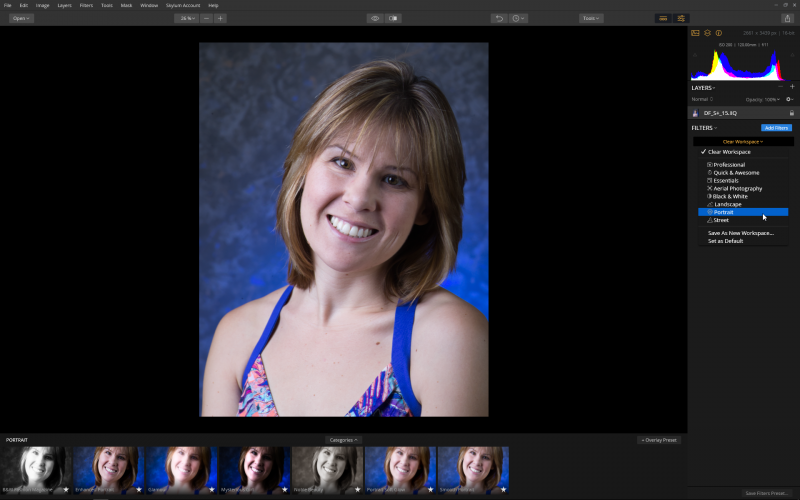
Luminar provides eight workspaces populated with the filters generally needed for the work for which they are named.
The latest Mac version of Luminar is the only one that supports Digital Camera Profiles (DCP) that are embedded in DNG files and DCPs that the user has applied to a DNG file. It also supports Adobe Photoshop Elements as a plug-in and third-party Adobe plug-ins. Both Mac and Windows versions open Lightroom and camera-acquired DNG files. A digital asset management module is promised in a future update for both platforms.
Much of the focus in the Jupiter release seems to have been on speed increases. Raw format files open significantly faster than in previous versions, but still lag behind Adobe Camera Raw in opening speed even when Photoshop is open but Camera Raw is not. However, with Luminar you can immediately begin working with Raw Develop and other filters and presets. With Photoshop you need to open the image as a Smart Object in Camera Raw to preserve your adjustments for a later time, and then open the image in Photoshop for other enhancements. Luminar speeds your workflow considerably over Photoshop.
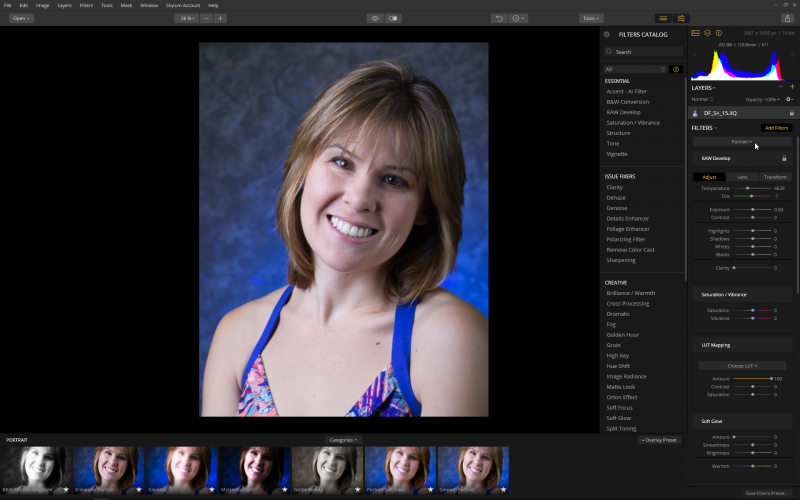
For raw format files, the Portrait workspace begins with the RAW Develop options, with other options available below.
With raw files, Luminar functions more like Lightroom but provides a much larger feature set, including presets, and the ability to compose images using layers. The Jupiter version claims support for a wider range of raw file formats, and I had no problem opening any, with the exception of DNG files from the new Sigma Quattro H, which Camera Raw will open.
The new Lens Auto Corrections tab is in the RAW Develop and Develop filters. These replace the totally manual corrections previously available. In the RAW Develop filter you mark checkboxes to automatically correct lens distortion, chromatic aberration, and to defringe the image. There are also sliders to manually adjust lens distortion and remove vignetting. Luminar calculates the coauto corrections by comparing the JPEG preview to the raw file and applies the manufacturer recommended corrections.
The Develop filter has fewer automatic controls and is used for adjusting files that are not in a raw format. The only automatic lens correction available in Develop is Defringe, leaving you to manually correct lens distortion and remove vignetting.
These new features add to the functionality of Luminar, which from its initial release seemed designed to appeal to all photographers—those looking for something better than basic applications and professionals who want an alternative to expensive or subscription-based programs but aren't willing to give up advanced controls. The wide range of presets available in seven prebuilt categories and the ability to install more will appeal to the first group of photographers. Professionals will benefit from the presets as starting places, as well as the eight prebuilt workspaces that group relevant filters into one panel. These range from the Professional workspace, with nearly all of the available filters, to Black & White, Landscape, Portrait, and more.
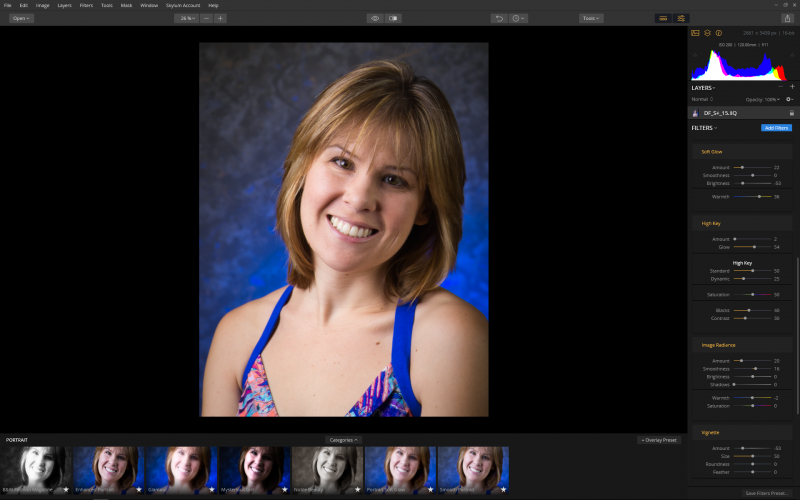
Filter options that you use are highlighted in orange. Choosing File>Save allows you to save all of your adjustments in a .lmnr format file for later adjustments.
While it's hard to be too critical of this rapidly developing software, there are areas that need work to compete as a Photoshop and Lightroom replacement. The tool needing the most work is masking. You can create a mask by brushing it on, or by selecting the Gradient Mask, Radial Mask, or Luminosity Mask options. For some users and some images, these may be adequate, but professionals need more masking options and the ability to refine the mask edge once they create it.
The ability to merge (Stamp) layers is a welcome addition, but only the Mac version has the ability to group layers. And the Windows version needs the white balance eyedropper found in the Mac version. Missing in both versions are RGB readouts. I look forward to the inclusion of all of these tools to make Luminar an even stronger competitor in the image enhancement marketplace.
Luminar 2018 is available from skylum.com for Mac or Windows systems with a perpetual license for $69. The download allows installation on up to five computers with any mix of platforms. It functions as a stand-alone program, but you also have the option of installing it as a plug-in to Adobe Photoshop and Adobe Photoshop Lightroom on both platforms. On the Mac, plug-ins for Adobe Photoshop Elements and Aperture are available as well as a Photos for Mac extension.
Stan Sholik is a commercial/advertising photographer in Santa Ana, California, specializing in still life and macro photography.
Tags: post capture