
How to Enhance the Sky in Your Photos
Enhance the look of the sky in your photos with Skylum’s Luminar 4.2.
• July 2020 issue
Whether you should or shouldn’t replace a photographed sky with one that’s more interesting has been a contentious topic among photographers. Regardless of that debate, modifying the original sky in an image can be a tedious, labor-intensive undertaking involving complex masking, blending modes, and other techniques. But there are times when you can’t wait for the perfect sky for a portrait background, or you can’t return to the landscape location when the sky is ideal. For these times I have found the sky enhancements in Skylum’s Luminar 4.2 to be a wonderful solution.
Luminar 4.2 is available for Mac and Windows systems, and the trial version is fully operational. Once you’ve installed the software, you load your images into the Library module, choose an image to enhance, and select the Edit module. Image adjustments are made by clicking the Essentials icon then selecting the Creative icon underneath.

The AI Augmented Sky allows you to add elements, such as the birds shown at top, to an original or in combination with a replacement sky.
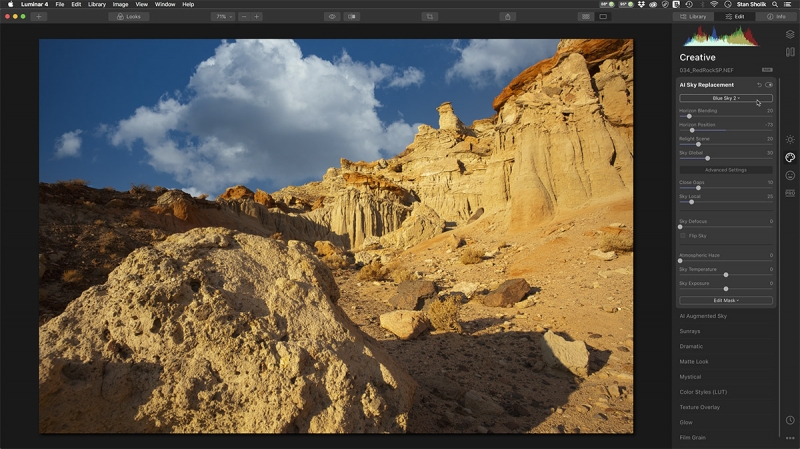
The top Creative panel is AI Sky Replacement. With this panel open, selecting the first button, Sky Selection, presents a selection of 29 installed skies. These range from blue with puffy white cumulus clouds to stormy overcast to night skies showing the Milky Way. Here’s where the going gets tricky.
For a replacement sky to be in any way believable, it needs to match the image in light direction, color, and scale. The ideal situation would be to return to the original location and take another photo with the same lens from the same position with a better sky. In some instances, with portrait, engagement, or wedding subjects, this may be possible, but usually it’s not.
The 29 installed skies present a good range of options. You can also use your own images by selecting Load Custom Sky Image from the bottom of the list.
I wish there were thumbnails of the installed options or that rolling over them would show a preview on your selected image; however, your chosen sky does load quickly so you can evaluate each one. For a sky that’s perfect except for the lighting being from wrong side, click the Flip Sky checkbox in Advanced Settings for an instant fix.
If the direction of light in your replacement sky is coming from the wrong side, the Flip Sky in Advanced Settings fixes it instantly.

A slider lets you reposition the sky vertically to better match the scene. You can also match the lighting with those of the new sky colors using the Relight Scene slider just below the Horizon Position slider.
For scenes with a definite horizon, the Horizon Blending and Horizon Position sliders help you make them look natural. If the clouds are too sharp to be believable with the subject, the Sky Defocus slider provides good control.
If you’re looking for a believable match between your original image and a new sky, Luminar 4.2 gets it right with no further effort required at least 90% of the time. All of the replacements in this article were done with no further adjustments.
More surreal effects are available in the AI Augmented Sky panel, with 34 objects ranging from auroras and planets to a giraffe that you can add to your photo. You can even combine a sky augmentation object with a sky replacement. I’m disappointed that I could add only one object to an image even after saving it as a new image. Perhaps this feature will come in a future update.
For now, I welcome the ability to easily enhance my skies if I so desire. Whether it’s the right thing for your images is something only you can decide.
Stan Sholik is a writer and photographer in San Clemente, California.
 View Gallery
Tags: post capture