A Fast, Affordable Portable Print Lab
A new lightweight dye-sub printer from DNP
8.7.2020
I've been making prints or having prints made by photo labs for more than 30 years. So when I had the opportunity to test the DNP QW410 dye-sublimation printer, I couldn't wait to put it through its paces. After making more than 400 prints in a range of finishes and sizes, I'm excited to share my impressions and make some suggestions regarding how you might use the printer for events and a range of other uses.
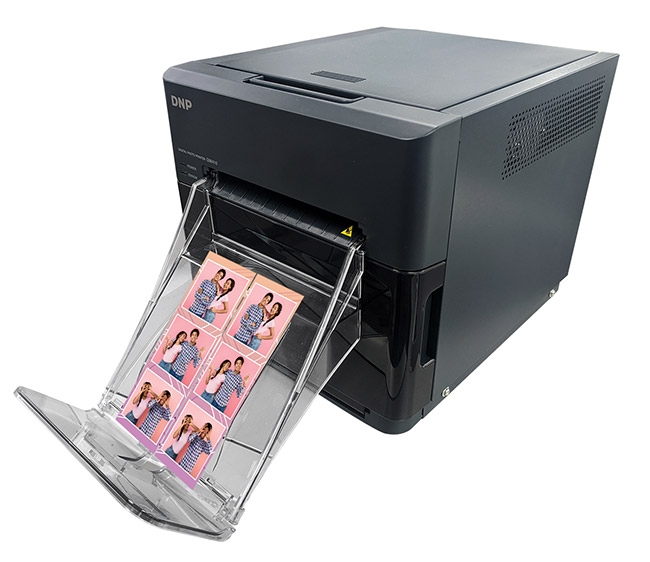
The DNP QW410 Printer with two 2x6-inch prints.
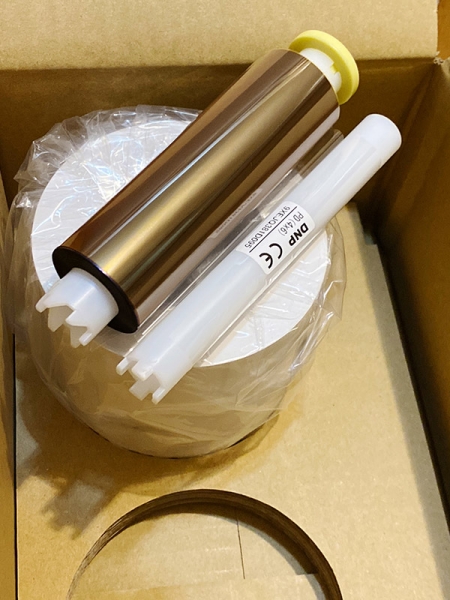
One of the two 4x6-inch DNP paper rolls that come two per box with its matching ribbon placed on top. As you can see, the rolls are protected well to help avoid damage.
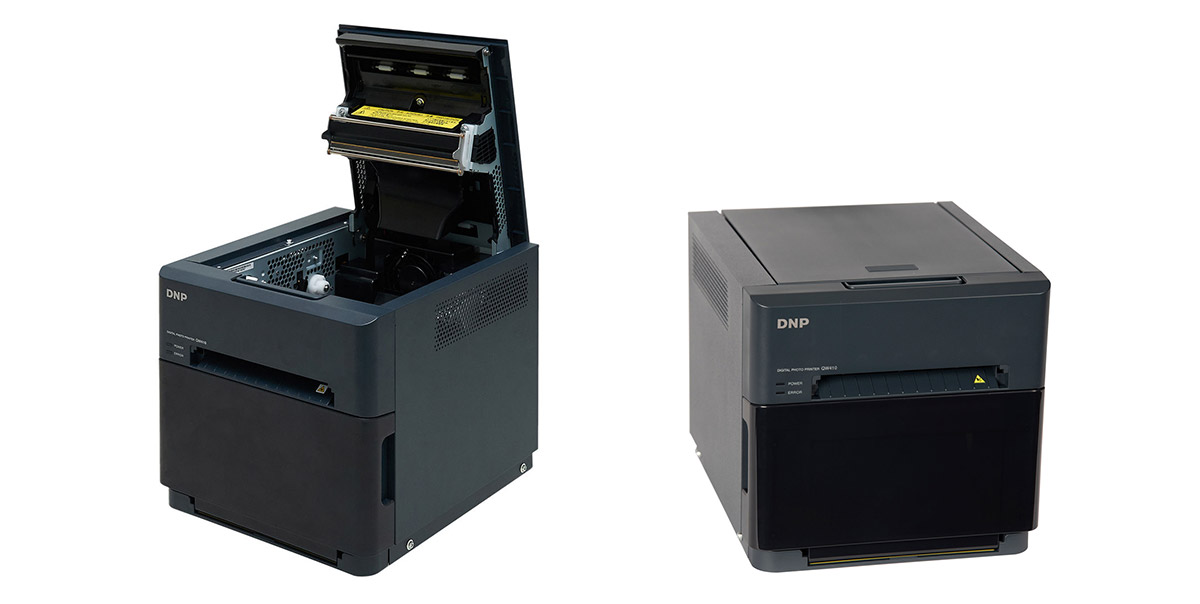
The printer I tested arrived well protected in a cardboard box. Due to the size of the box compared with the more compact size of the printer, a form-fitting padded case would be ideal for storing and transporting the printer and supplies.
I also received three separate boxes, each one containing two rolls of paper and two printer ribbons (not included with the printer). One box had two 4-inch-wide rolls (capable of making a total of up to 300 4x6 prints), the second had two 4.5-inch rolls (capable of making up to 220 4.5x8 inch prints), and the third had two 4-inch-wide rolls (each with a perforation running down the center, which allows for 4x6 inch prints to be easily separated into two 2x6-inch prints). To use the 4-inch-wide rolls, a thin plastic spacer needs to be attached to each paper spool.
Each of the paper rolls comes with a dedicated ribbon. The paper and ribbon should always be installed as a set, which means that you'll probably end up with a few extra feet of paper when the ribbon runs out. The print driver keeps a count of how many prints are left, which is very helpful. The printer also comes with a paper tray that's easy to install and that holds about 20 prints in sizes up to 4x6 inches.
The thing that stands out right away with the QW410 is its size and weight. Its dimensions are 8.18x9.44x7.79 inches (WxDxH) and it weighs just over 13 pounds with a full roll of paper and ribbon installed. To give you a better visual of what that size is, picture a basketball with a box around it.
I downloaded the Mac driver and the latest ICC printer profiles and installed everything on my MacBook Pro (Windows versions available). DNP also makes a Hot Folder Print Utility for Mac and Windows that offers more streamlined printing, which I didn't test. Direct printing from Mac, Windows, iOS, and Android devices is possible with the DNP Wireless Connect Module (about $150), which can also connect to two DNP printers simultaneously.
The cost of the printer is just under $500. For most busy photographers, that means a second or third QW410 could be purchased as a backup. Having one or more extra printers also means you’ll have an extra paper spool, thus avoiding the need to add or remove the paper spacers when changing from 4 to 4.5 inch paper rolls.
The price of each 4x6 print is about 25 cents, 4.5x8 inch prints are about 40 cents each, 4x6 perforated prints are about 55 cents each. One of the main advantages compared to most inkjet printers in a similar price range (in addition to faster print speeds) is that you don't have to worry about head cleanings or changing individual inks. Knowing that you have 150 or 200 prints ready to go, with little chance of having a paper jam or other interruption, is a very good feeling.
Inserting the paper and ribbon the first time took about five minutes, but after I got used to the process, I was able to change both in less than two. Lightroom Classic is my go-to application for printing, and it was a joy to use with the QW410. I set up some print presets for both paper rolls, and had great results with the QW410_PD ICC profile (PD stands for Premium Digital) provided by the company, especially when I made a few additional adjustments in the print driver (see sidebar for my settings). There are many other ways to print to the machine, and I would contact the manufacturer if you have any issues with your hardware or software.
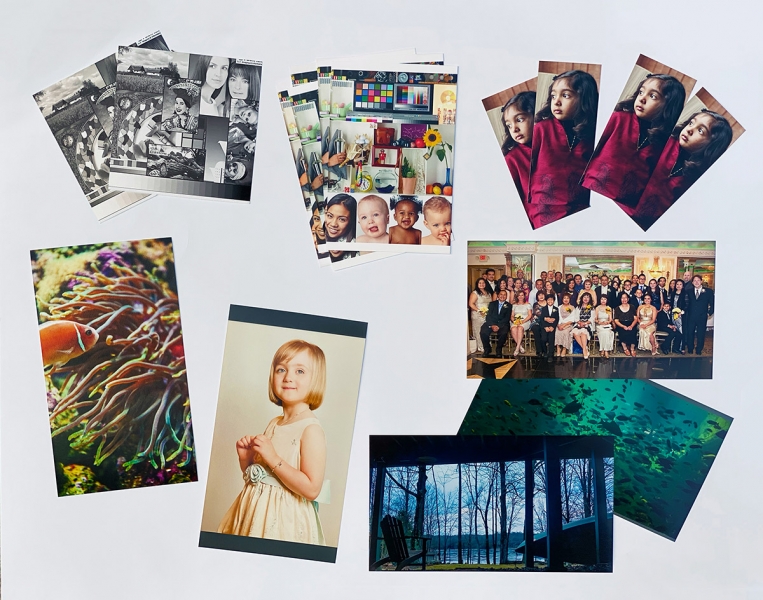
It was an adventure to try out all the print variations with the DNP QW410. In the top right are four 2x4.5-inch prints cut by the machine. In the top left are two 4.5 x 4.5 inch prints. In the center-top area are 4x6 prints of the PDI target that I describe in the article. The rest are 4.5x8 inch pano prints. All were cut by the printer.
Regarding print quality, I was extremely impressed. The prints I made have outstanding vibrance and sharpness, and equal or exceed the look and feel of prints from a high-end pro lab. Even very small faces on group portraits rendered with superb detail and sharpness. The prints also came out without any curl, which is not usually the case with many lab prints. There is a decurl option in the Mac driver, and I didn't see much difference with it on or off. In either case, prints laid extremely flat after printing. As the roll gets smaller, I can see how the decurl option might really make a difference. According to the company, some versions of the driver will allow you to set decurl to Enable, Disable, or Auto. It didn't alter the quality or speed of printing for me, so I see no reason to ever turn off decurl.
One of the major advantages of the printer is that a glossy or matte finish can be chosen for any prints with the press of a button in the print driver, which is mind-blowing. The difference between the smooth gloss and a semi-gloss finish is incredible. DNP calls the semi-gloss option matte, and it has a slightly textured finish. I much prefer the matte option, but I know many people prefer glossy.
Print and cut options with the 4x6 rolls are 4x6 and 4x4. Print and cut options with the 4.5x8 rolls are 4.5x8 (a new panoramic print option called QHD by DNP), 4.5x6 and 4.5x4.5. What that means is you don't have to do any of the cutting yourself. I can't explain how happy that makes me feel after having to cut so many inkjet and other types of prints in the past. In addition, there is a 2-inch cutting option in the driver for the 4- and 4.5-inch rolls that allows you to make three 2x4 prints or four 2x4.5 prints—ideal for photo booths and events. I created a few of these, and they turned out great. The perforated material printed just as well as the non-perforated material, and separated very easily with only a hint of the perforation edge visible after separating it. That being said, I would opt for manual cutting if that’s an option for your workflow because of the lower cost of the non-perforated paper, and because you will have much more flexibility re: the sizes of prints you can make.
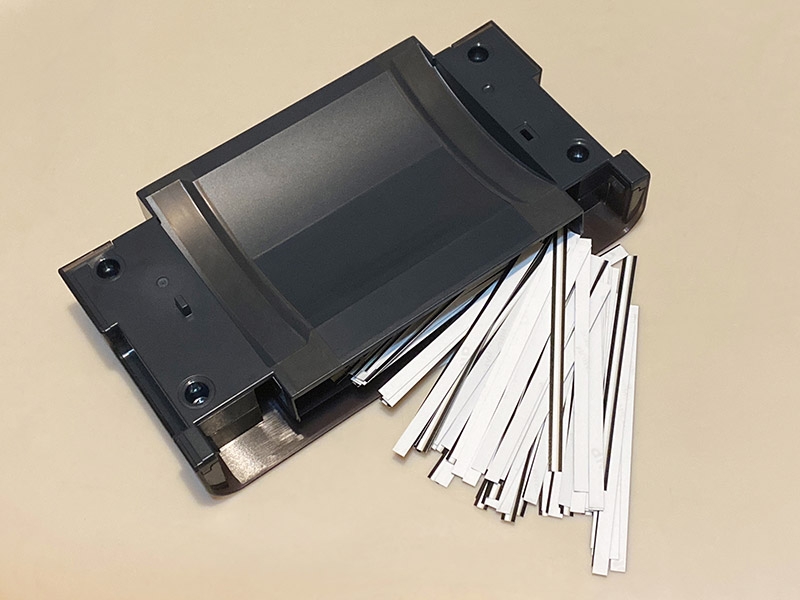
The QW410's paper scrap bin, which stores thin pieces of paper as the printer operates. It looks like you could print close to a thousand prints before the bin would be completely full.
I was very pleased with the print speeds. I timed the prints from the moment I heard the printer start making noise, and 4x6 and 4x4 prints took just about 30 seconds; 4.5x6 and 4.5x8 prints took about 35 seconds each. In the driver, there’s an option to choose High Density or High Speed, but at most, I saw a one second improvement in speed with the High Speed option selected, and I could not see any difference in print quality or density between the two options.
Stress Tests
Two important topics to discuss are print longevity and resistance to moisture and other elements. I tested water resistance by running water from a faucet for about 10 seconds over both the glossy and matte prints. Both dried off without any noticeable effects. I also did a light fingernail scratch test (even when the prints were covered with water), and both prints performed amazingly well. However, those with the matte coating fared a bit better overall.
Regarding print longevity (noticeable fading or color shift over time), I didn't have months and the equipment to properly test the exact media and ribbon sold for the printer, but a representative from DNP responded to a query, stating, “DNP prints can be expected to not noticeably fade and/or shift in color for a minimum of 50 years if stored in cool, dark conditions,” and that choosing “glossy vs. matte finish does not cause a difference in longevity.” The representative added, “DNP did a study that shows DNP media outperforms other media types when exposed to water (and other liquids, such as red wine, coffee, tea, and ketchup). Ozone stability also can be expected to exceed 50 years. The prints are laminated with the OP (clear coat) layer over the colors on the paper. This seals in the colors and protects it from the environment.”
If you want to preserve for a long time I recommend putting them behind glass with an archival matte (especially if you choose the glossy finish). In general, glossy prints are more prone to sticking to glass inside a frame, depending on the environment.
Another huge plus is the printer's relatively low power draw, which allows it to be run from a variety of portable power stations from makers like Anker, Goal Zero, and Jackery. According to the company, it's important to choose a battery that provides a pure sine wave and that can handle whatever peak and sustained Watt hours are required by the printer. I attached a power usage monitor and found that the printer drew a maximum of about 97 watts when printing, and about four watts when not printing. That power draw is important to keep in mind when choosing a battery. You can also attach solar panels or other renewable power generation devices to some portable batteries.
One negative of the printer is that it's a bit loud during print output. I measured a level as high as 75 decibels from about 6 inches away on my Apple Watch. When the machine is not printing, it’s silent. Also, the paper tray can only catch and stack prints that are about six inches tall, but the printer can output 4.5x8 inch prints, so only one of those can be kept in the paper tray at one time. I placed a box under the print output slot and made sure prints exited properly before stepping away. Seventy prints later, I returned and was pleased with the results. I would have also loved if DNP had added another half inch to the width of the rolls to be able to produce 5x7 and 5x8 prints.
The DNP QW410 printer is a truly amazing machine thanks in part to its compact footprint and light weight, under $500 price tag, overall print quality and output speed, on-the-go power options, and ability to switch glossy or matte finish on a print-by-print basis. Due to the popularity of photo booths, I can see the product becoming a staple for many photographers. I can also see how the 4.5x8 inch print size could be used to print mini contact sheets. For example, you can get 20 1x1.5-inch prints, or six prints that are almost 2x3 inches on one sheet. I've found contact sheets to be an excellent way to give gifts or to help sell larger prints at events compared with just showing images on a laptop screen.
Andrew Darlow is a photographer and digital imaging consultant based in the New York City area.
Tips for Getting Better Color and Black and White Prints with the DNP QW410
1. Color Prints
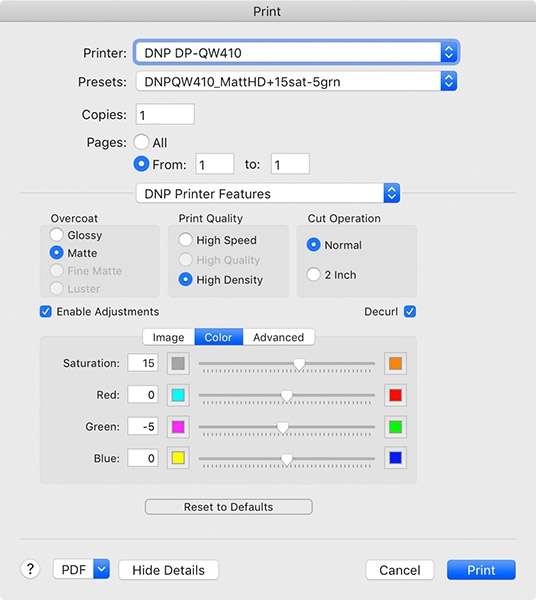 To optimize the color accuracy of printed images, I used the QW410_PD ICC Profile and then made the following two adjustments in the driver: +15 Brightness and -5 Green. To test any printer, I always start by printing a standard color test image like the PhotoDisc target, available for download at bit.ly/4x6Test.
2: Black and White
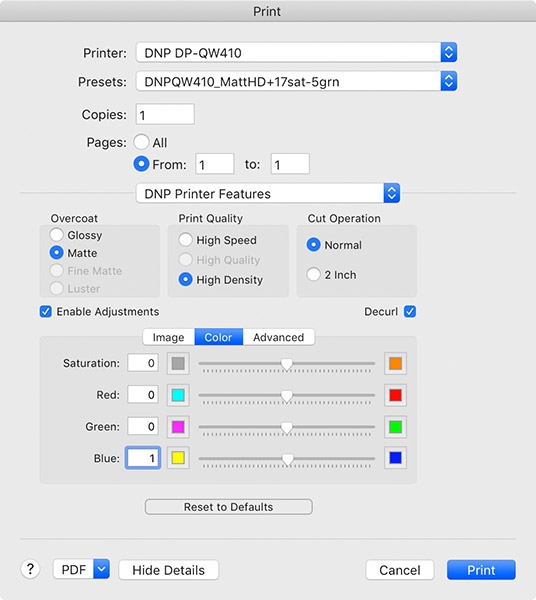
The QW410 can produce outstanding black-and-white or toned prints. I found that when I printed neutral black-and-white photographs with no profile or adjustments in the driver, my images printed out slightly warm in tone, which looks very good. However, for a more accurate neutral tone, set the Blue to +1 or +2 in the print driver.