
Beauty in the Basics: Scott Robert Lim Teaches the Fundamentals
To make a great portrait in any location at any time, you just need a couple of flashes, a video light, and a good grasp of these fundamentals.
• September 2020 issue
With over 70 international photography awards to his name, Scott Robert Lim, Cr.Photog., has clearly mastered his craft. But what motivates the accomplished wedding and portrait photographer at this point in his career is less about gathering more hardware and more about sowing altruism.
“I have a drive to be a better photographer but not necessarily to win another award,” Lim says. “What turns me on and makes me happy, what pushes me—the why in what I do—is that I want others to create the award-winning shot. I want others to find success in their business, to find their creative self. That is satisfying for me. That is what drives me to be a better photographer.”
To that end, Lim, who has been a wedding photographer for 20 years, also works as an educator, teaching workshops to image makers around the world. His specialty is location portraiture with minimal, low-budget, easy-to-pack lighting. “Give me a couple of flashes and a video light, and I can shoot anything anywhere in the world.” Before the coronavirus pandemic, he traveled internationally three times a month to share his skills with budding photographers.
Three keys to great images
To be a consistently good photographer, you need to master three things, says Lim: composition, posing, and lighting. “All of them work together,” he says, so if you’ve mastered composition and posing, and you can make natural light portraits but not light a nighttime portrait, you’re falling short. Mastering each completely allows you to enter what Lim calls “the no-thinking zone.” You’re no longer trying to overcome obstacles or solve a problem while shooting. You know what to do, so your brain is free to be creative. That’s when your signature style begins to shine through, he explains. Lim aims to show photographers how to master these fundamentals with minimal equipment.
Composition: The primary composition concept Lim teaches is to place the portrait subject in a clean location. “I call it the ‘Scott spot,’”—a place where the subject’s background lacks distraction. Instead of the rule of thirds, Lim advises to look for shapes in the environment. The subject should be placed in the largest shape. Finding that shape may mean moving the subject, or it may mean changing your perspective. Often, for example, the largest shape in the environment is the sky, so you may need to crouch low and shoot up to place the subject in that shape. “You can kind of control the size of your shapes by your perspective and where you are—shooting high or shooting low, or to the left or to the right,” he explains. “You create the shapes in your environment by what you’re given and then you place the subject in the largest shape you create.”
“It’s easy to use shallow depth of field to blur everything out,” he says. “But that is the lazy way to create composition.” If you look at your portfolio and you see a lot of vertical photos where the subject fills the shot, that’s a sign your composition skills need work, he says. “Landscape shots really show people that you have a mastery of composition because you’re forced to put more elements into your photography.”

Posing: Posing and lighting go hand in hand. Lim teaches two important posing concepts: First, the subject’s nose should always be toward the light. This is especially important when photographing in bright daylight, as the strong sun can create unpleasant shadows and highlights. “Your eye is going to go toward what is brightest and what is sharpest,” he says. “If you’re in bright sun and the nose is toward the light, that guarantees the face is going to be brightest point in that shot. But if you turn your nose away from the light, or you’re not aware of where that light is and you’re in super bright light, your face is going to be in shadow.” Fixing that in post-production will be a challenge, if not impossible.
The other posing concept he emphasizes is for the subject to shift their weight to one leg, which creates a relaxed pose by breaking up the vertical lines in the subject’s posture. This posing technique should complement the lighting. For example, one of the most challenging portraits to make, says Lim, is a portrait of a subject with a dark complexion wearing all white in bright sunlight. If the face is toward the sun and the white clothing is also in the sun, the clothing will be brighter than the face. But if the subject shifts their weight so their body is in shadow, the face will become the focal point of the portrait.
“That’s probably one of the hardest situations to shoot,” he says, one that he’s had to tackle many times in his years photographing brides in bright sunlight.
Lighting: Lim recommends photographers master natural light—including how to capture a catch light in the subject’s eyes via natural light—before moving on to additive light. “Natural light first, then constant light, and then flash,” he says, is the best learning progression. Many photographers begin with flash and become dependent on it, he notes. “You want to be a well-rounded photographer when it comes to light because sometimes you can only use natural light. You have to use the right tool for the right situation.”

For example...
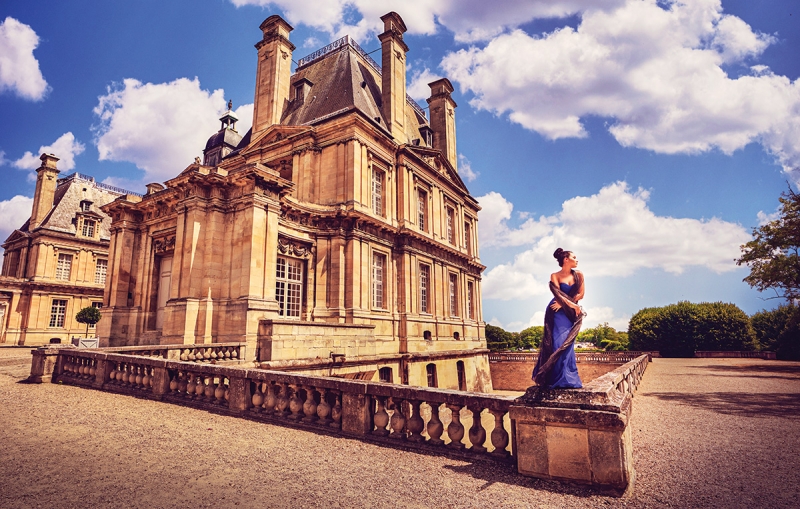
The photo above illustrates several of Lim’s composition and posing techniques:
- The subject is situated in the “Scott spot”—the largest shape in the photo with the least distraction, which in this case is the open sky between the trees.
- Her nose is turned toward the light.
- Her weight is shifted to her back leg. This makes for a relaxed pose and puts the white dress in shadow while her face and neck receive the light, ensuring they’re the focal point of the photo.
CAMERA & LENS: Sony ILCE-7M2, Sony FE 16-35mm F4 ZA OSS lens
EXPOSURE: 1/125 second at f/8, ISO 100
LIGHTING: Two strobe flashes through a 33-inch translucent umbrella
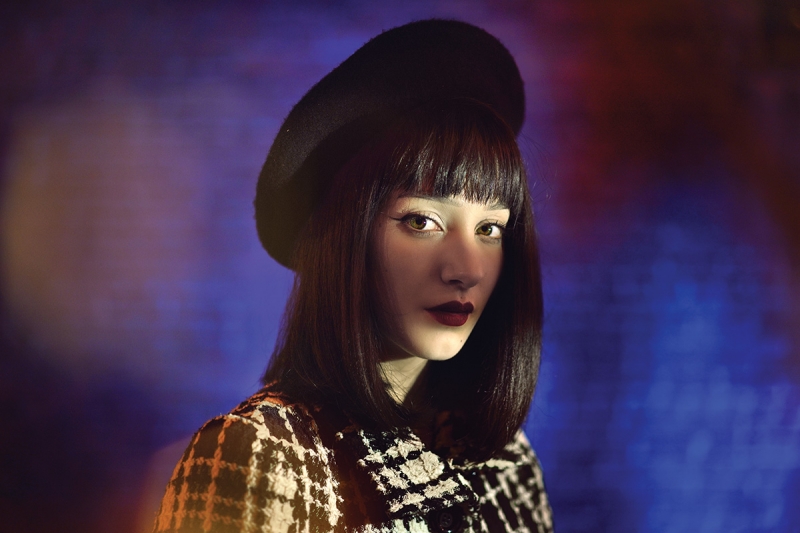
Fork Noir
Lim likes to teach students how easy it is make a seemingly complex portrait in minutes using limited, inexpensive equipment. In this case (above), a plastic fork and an iPhone flashlight created a film noir effect. The iPhone flashlight, shown through the plastic fork, acted as the main light. He also fired off a flash with a blue gel on the brick wall behind the subject. The highlight across the subject’s eyes was thanks to a slit in the fork, while the shadow across her nose and lips was thanks to a tine. “I told the person holding the iPhone to make sure the strip of light was across the eyes,” he says.
CAMERA & LENS: Sony ILCE-7RM, Sony FE 55mm F1.8 ZA lens
EXPOSURE: 1/60 second at f/1.8, ISO 400
RELATED: Enjoy a gallery of Lim's portraits
Amanda Arnold is associate editor of Professional Photographer.
 View Gallery


