
An image editor to challenge Photoshop
Image editing software Serif Affinity Photo not only comes close, it offers many improvements over Photoshop and doesn't require a subscription.
5.5.2017
If you’re a PC user, you know there are Windows-compatible photo imaging programs aimed at taking on Adobe products. Now Serif Europe has joined the fray. After last year’s highly successful introduction of Affinity Photo for the Mac, Serif Europe has released Affinity Photo for Windows. The identical feature set allows full cross-platform compatibility of the two products.
Feature for feature, Affinity Photo in its present version 1.5.1 comes close to matching Photoshop and offers many improvements on the Photoshop model, including a simple automated focus stacking process.
- Raw file editing
- Supports common imaging file formats, including PSD, PSB, and DNG, while keeping layers, effects, adjustments, text, and EXIF
- Includes many filters with real-time previews that are applied as live layers, enabling you to edit, erase, and mask them after they’re applied (no Smart Objects needed)
- Provides a full complement of adjustment layers with nearly instant response that you can drag and drop onto any other layer or group in the layer stack
- Provides 28 live blend modes that you preview as you roll your mouse over them
- Includes a full complement of selection tools and the ability to refine selections
- Provides advanced manual lens adjustments but no library of cameras and lenses (yet)
- Gives you the ability to paint masks with a brush as well as add a mask to a selection
Affinity Photo offers all of this in a non-subscription program for $49.99 directly from Serif.
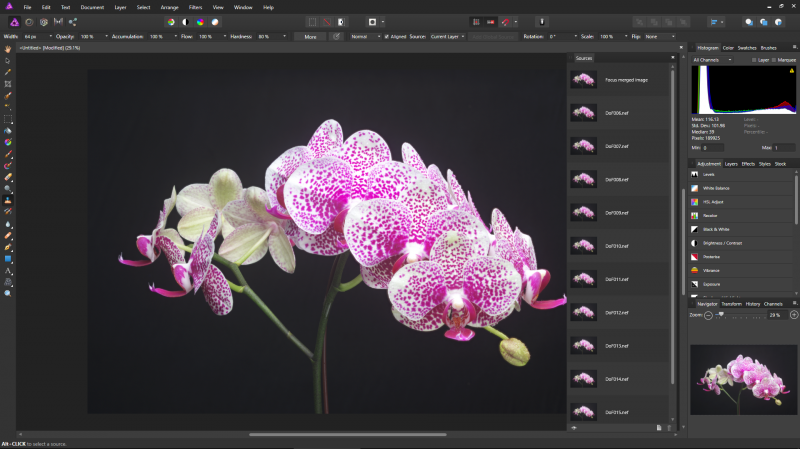
Affinity Photo includes the ability to perform focus stacking.
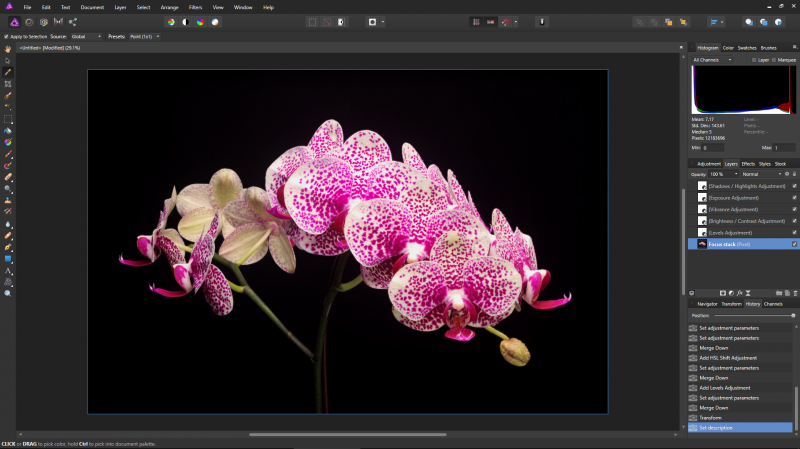
The interface is familiar to Photoshop users. The layers and history subpanels track your every adjustment.

A completed focus stack using the New Focus Merge option in the File dropdown menu
WORKSPACE AND TOOLS
The Affinity Photo workspace will look familiar to Photoshop users, but rather than Photoshop’s single workspace (plus Camera Raw), Affinity Photo has five modules that open in the same window. The program’s modules, called personas, are Photo, Liquify, Develop, Tone Mapping, and Export.
PERSONAS
Photo: The core set of image adjustment tools
Liquify: Includes warping tools for special distortion effects
Develop: Raw file processing, lens correction, tonal adjustments.
Tone Mapping: Tone mapping HDR and non-HDR images
Export: file export options as well as image slicing tools.
There is also a Panorama persona that’s accessible from the File menu.
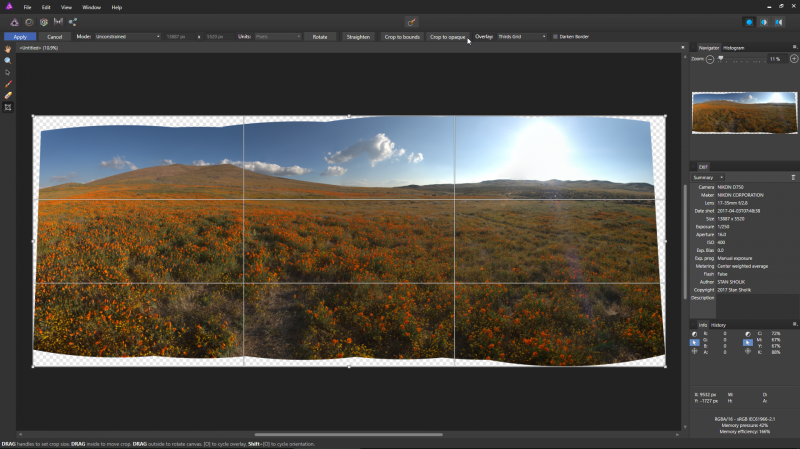
Affinity Photo did an excellent job stitching this hand held panorama.

A completed panorama using the New Panorama option in the File dropdown menu
The Tools panel can be docked or undocked, shown or hidden, and is highly customizable. Keyboard shortcuts are often identical to those in Photoshop but also completely customizable. The Context toolbar directly above the preview image varies with the chosen tool, showing its option.
The adjustment panels are arranged in groups with tabbed subpanels. One group comprises the histogram, color selectors, and brushes. Another holds adjustments, layers, effects, styles, and a Shutterstock link to stock photos. The third group features a navigator, transform, history, and channels subpanels. While the arrangement differs from Photoshop’s, they are customizable. The only Photoshop item I couldn’t locate and really missed is the histogram clipping indicators. Version 1.5 of Affinity Photo now includes macro support (similar to Photoshop Actions), batch processing, and even 360-degree image editing.
For portrait retouching, the red eye and blemish removal tools are found in both the Develop and Photo personas. And the best technique for serious face retouching—frequency separation—is readily available. The Frequency Separation tool automatically separates image information into high- and low-frequency elements, allowing skin retouching without compromising the skin texture or the sharpness of the eyes and lips.

The Frequency Separation filter provides a powerful tool for portrait retouching (before)

The Frequency Separation filter provides a powerful tool for portrait retouching (after)
Serif does Adobe’s content-aware fill one better with its InPainting Brush: simply paint over the object you want to remove and it fills with nearby image data. It works as well as content-aware fill and is simpler and easier to use.
Filters in Affinity Photo are not only re-editable, they also display live in the main preview image. This eliminates the need to apply filters in a separate window. This is true of Affinity Photo’s depth of field, elliptical, tilt-shift, and radial blur filters, and is especially helpful with the lighting filter.
And Affinity Photo offers non-destructive image scaling by retaining the original full-resolution image. If you later need a larger or smaller copy, you resample from the full-resolution version, not the previously resampled one.
In Affinity Photo Save and Save As commands save files in the proprietary AFPHOTO format. This format non-destructively saves all your adjustments as well as your editing history. To save in a common file format, including PSD and PSB, you use the Export command. Some edits, such as live re-editable filters, lose their editability in these formats. You must resize the image before exporting as the export command does not have options such as inches and centimeters or a drop-down menu to select dpi.
A DOWNSIDE
My strongest criticism of Affinity Photo is the lack of a visual file management persona akin to Adobe Bridge. The Affinity suite, which includes Photo, Designer, and Publisher, offers no way to import images into your computer or to browse images visually. Lacking these capabilities, you’ll still need to rely on Lightroom, Bridge or Photoshop Elements for organizing and cataloging images.
IN SUMMARY
Serif makes it clear that the program is written to take on Photoshop, and it’s doing that very well for an application essentially in its first release. If you’re not a fan of the Creative Cloud subscriptions and stuck on CS6, it’s probably worth the $49.99 to catch up with modern photo editing tools. A 10-day free trial version of Affinity Photo for Windows is currently available. And there are excellent tutorials online and through Help within the program. But if you’re using Photoshop CC 2015, a $49.99 investment in the Affinity Photo guarantees you free updates for two years, a way to work on Photoshop files if your license relapses, and a chance to watch the program as it matures into an even more powerful image editor.
Stan Sholik is a commercial/advertising photographer in Santa Ana, California, specializing in still life and macro photography.
 View Gallery
Tags: gear post capture